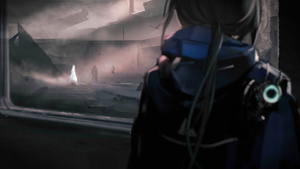
Episode 10
| Episode | Unsigned Notebook | BGM |
- This article is about the episode's article. For the episode's release event, see Episode 10: Shatterpoint.
The tenth episode of Arknights' Main Theme is titled Shatterpoint.
Synopsis
The Sarkaz United
Far in Londinium, the capital of the Victorian Empire, two familiar figures stare at the rusted city while discussing their grand mission. After years of slowly spreading Sarkaz influence in Londinium and planting his loyalists into Victoria's defense force and aristocracy, Regent Theresis has finally secured his position in the Royal Court thanks to the support of the Nachzehrer King, the Vampires' Sanguinarch, and the Damazti Cluster. Theresa, the former Sarkaz King of Kazdel, has also been "resurrected" thanks to the Arts of the Confessarii; however, it seems she is intended to be used as a puppet for the Regent in order to rally the Sarkaz.
Theresis' occupation of Londinium is not without purpose. After being invited by a Grand Duke to pacify the situation following the succession crisis, Theresis has been actively building up his military there. He has ordered the reconstruction of the Shard into a gigantic Catastrophe manipulator and the building of an airship fleet around the tower. He has also redesigned the function of Londinium's defense artillery system, made up cannons built around the city's outer walls with the ability to automatically track targets, to face inward instead. His ultimate wish is to launch a world war against all nations of Terra to end the Sarkaz's never-ending disunity and restore Kazdel's former glory.
Chaos in Londinium
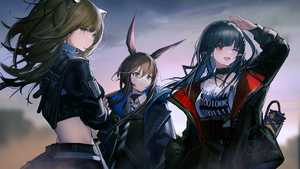
Deep within the capital, numerous factions are fighting against each other to secure the situation. As guardians of Siege, heir to the Victorian throne, the Rhodes Island team led by the Doctor, Amiya, Closure, and the Glasgow gang plan to infiltrate the heavily fortified city with the aid of Misery, Logos, Ascalon, and W. The team's goal is to get in touch with Heidi Thompson, Kal'tsit's personal Messenger. Dagda and Indra eventually rescue Mr. Thomas, a Londinium citizen and informant, from Dublinn, who had been holding him hostage for his ability to navigate around the city; he agrees to help R.I. find a way into Londinium through the port at Sudean.
At the same time, Dublinn has made a temporary alliance with the Military Commission of Kazdel, under the command of General Manfred and Hoederer, in hopes of carving up Londinium for themselves; their purpose is to help prevent the eight Grand Dukes from entering the capital and seizing and attempting to seize control from the Sarkaz. However, the alliance is not a smooth one, since Mandragora and her squad are upset with the Sarkaz's presence. To make matters worse, a local partisan group calling itself Eartha, or the "Self-Salvation Corps," has been resisting both Dublinn and Kazdel through guerrilla street fights. Eartha is made up of ordinary Londinium citizens who oppose the Sarkaz invasion and have taken up arms against them. Meanwhile, Horn, who has successfully escaped Dublinn's imprisonment after being captured by them at the end of Episode 09, frees other Victorian soldiers captured by Dublinn and leads her new squad into Sudean as well.
When R.I. makes it way to Sudean, however, their way is blocked by a group of Sarkaz soldiers searching everyone going in or out of the border. Mr. Thomas panics, thinking they are after him, but runs directly into the Dublinn infantry lead by Mandagora, who have now reached Sudean and who also promptly capture him. Infighting soon breaks out between the Kazdelian soldiers and Dublinn over custody of the informant. Horn instigates the violence by shooting at the Sarkaz soldiers, who immediately attack Dublinn in retaliation. R.I. steps in to protect the civilians from the gunfire, but because they blew their own cover, word is sent to General Manfred that the Eartha rebels and an unknown group have infiltrated Sudean. Little do they know, however, that Manfred had already planned for this, intentionally leaving Sudean poorly guarded to draw out the rebels there and using the scuffle as an excuse to get rid of Dublinn. Meanwhile, Dublinn appears to be winning the scuffle, with the Sarkaz appearing uncharacteristically weak—Amiya and the Doctor then surmise that the entire operation was a trap, and order R.I. to retreat from battle. They are proven right when Manfred uses Londinium's defense artillery system to begin firing explosives at the Sudean port, one of which kills Mr. Thomas. Seeing that the informant is dead, Mandagora also orders Dublinn to stop chasing after the Sarkaz and retreat, with the artillery system still following them. Even after routing Dublinn, however, Manfred commands his troops to continue bombing the port until it is completely destroyed. In the meantime, R.I. has hidden under some structures to escape the cannon-fire, but know the cannon-fire will reduce their surroundings to rubble in minutes. Suddenly, a stranger appears, holding the Doctor hostage until Amiya agrees to follow him and promising to save the group from certain death.
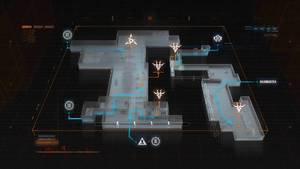
The stranger brings R.I. down a pipeline into Londinium's underground, consisting of pathways which connect the city to the outside. He eventually introduces himself as Feist, one of Eartha's leaders along with Rockrock. Rockrock is suspicious of R.I. due to the presence of Closure, a Sarkaz operator, though Feist defends her and brings the team to see Clovisia, Eartha's young commander. Upon speaking to Amiya and the Doctor and hearing that they plan to help Eartha push the Sarkaz out of Londinium, Clovisia agrees to a joint alliance with R.I.. Meanwhile, Rockrock and her teammate, Bill, are ambushed by Sarkaz soldiers during a mission. Bill stays behind and is captured, though Rockrock manages to escape and return to the underground bunker with the intel that Heidi and other rebels are being held hostage by the Kazdelians in a Loxic Kohl factory (formerly owned by Mr. Thomas). Thus, R.I. and Eartha head out on their first joint operation to rescue Bill and Heidi from the factory.
At the same time, Horn, who has been hiding above-ground from the Sarkaz with the few men she has gathered, also manages to scout out the prison where Heidi is being kept.
The First Liberation
After tedious preparation, the R.I.-Eartha alliance is ready to breach the Kazdel-occupied factory on a particular night. Siege and Indra have stayed behind to defend Eartha's underground bunker, with the rest of the team heading to the prison. Dagda and Morgan distract the Sarkaz soldiers guarding the prison while Heidi leads her own uprising within the prison, allowing the prisoners to take over the factory. Heidi meets up with the Doctor, Amiya, Feist, and Rockrock, who have also infiltrated the prison, though Sarkaz soldiers surround them. When all hope seems lost, however, W and her mercenaries, sent by Kal'tsit, appear on the side of R.I., fighting back their fellow Sarkaz. Feist and Rockrock run off and find Bill, who is still grievously injured. They also run into Hoederer during the rescue, who proves to be a formidable foe, but narrowly manage to escape up a vent back to reconvene with R.I.. Hoederer's presence, and the growing number of Sarkaz surrounding the facility, prove to the group that the prison was a Sarkaz trap meant to lure out both Eartha and R.I.. They decide to all make a run for it in a bid for survival. W's escape is foiled by Hoederer, however, who W confronts for killing Schwab to gain Theresis' trust. The two begin exchanging blows, though Hoederer soon gains the upper hand. Just as he is about to kill her, Ascalon appears and deflects his blade. It is revealed that Hoederer is actually working with Ines, who was supposedly executed by soldiers, to inform W about the resurrected Theresa and the plot within the Shard.
Meanwhile, Horn and her squad have also found their way into the factory and encounter Mandagora. Though tensions are still high, with Mandagora having killed some of Horn's teammates and taking her prisoner, there appears to be a mutual understanding between the two that the Sarkaz are the greatest threat to them. Mandagora orders her men to clear out hordes of Sarkaz soldiers, as vengeance for the deaths of her comrades during the infighting; she also intends to rescue "Spy," a Dublinn informant and her childhood friend. Horn and her group follow Dublinn, picking off any stragglers left behind. She soon comes across a group of Victorian prisoners, who she frees and adds to her squad. She also manages to escape from Manfred's grasp after Misery, a R.I. Elite Operator, appears and uses his hallucination-inducing Arts to allow Horn to make a run for it. Mandagora, meanwhile, successfully rescues Spy, but is ambushed by Manfred and his men, who have caught on to her betrayal. Manfred reveals to Mandagora that the Leader of Reunion is displeased with her unauthorized actions at County Hillock and her violent instability, and unwilling to let her compromise Dublinn's relationships with Theresis and the Victorian nobility; in other words, the Leader has abandoned her, and given full authority to Manfred to dispose of Dublinn forces within Londinium. After a fierce battle, Manfred leaves a critically wounded and despondent Mandragora for dead, where she resigns herself to joining her Taran compatriots in death. However, Misery appears before her, offering her a second chance.
Siege and Indra soon grow worried about the state of the operation after not hearing from the rest of the team for a while. They come across the corpses of Eartha's Team 6 on the surface, who have been torn apart by the Sanguinarch's blood Arts, and hurry to meet up with Amiya and the others, who are still running from the Sanguinarch. Upon finding the rest of the squad, Siege and Indra quickly explain that Eartha has come under attack; this forces R.I. and Eartha to make their escape underground and return to the underground base. Dagda, meanwhile, goes off to seek the help of the Victorian nobles' mercenary forces using her connections.
Insurgency Above, Threat Below
Despite their narrow escape from the factory, the threat to the alliance is still far from over. The Kazdelians have somehow gained the intel to route Eartha's underground passages and have also figured out the location of the bunker. Clovisia also receives the news that all of Eartha's contact points above ground have been attacked at once. The traitor within Eartha's ranks turns out to be "Bill," who reveals himself to Amiya to be the Damazti Cluster, a shapeshifter who had transformed into the likeness of the real Bill before R.I. and Eartha had infiltrated the prison—the man that Feist and Rockrock had rescued and brought along with them was not "Bill" at all, but the disguised Cluster, while the real Bill had died of his injuries within the factory. They had also been the one to give away R.I.'s coordinates during their escape from the factory, explaining why it was so difficult to get away from the Sarkaz. The Doctor, Clovisia, Rockrock, and Feist find Amiya holding a blade to the imposter's throat, but the latter two believe Amiya when "Bill's" behavior grows more and more suspicious. The confrontation is interrupted, however, when Closure rushes in to tell everyone that Londinium's cannons are aimed right at their location and that they must evacuate as soon as possible. The group flees to a safe location, though the Cluster escapes in the chaos and makes their way back to Manfred.
Clovisia tells the others that the only way to escape the underground with their lives is to recapture a train station located a few kilometers above them, and to take the train out of Sudean before the entire area is bombed. After they have successfully arrived at the next station, Heidi's contacts will help disguise them until they can reach Central Londinium. The only way to stop the Kazdelians' advance is to recapture Londinium's walls. Rockrock and her men go to get the train started before the Sarkaz can destroy the underground, while Amiya, the Doctor, and Feist head off to the walls to face Manfred, whose Arts are perfectly tailored to resist Amiya's. Meanwhile Horn's squad have also successfully climbed the walls, rallying the soldiers stationed there who have been forced by the Sarkaz to fire upon their own city and starting an insurgency against the Kazdelians. Horn stays behind to fight Manfred and stall for time while the rest of the group heads to the control room. They are able to set off explosives which destroy the control room and severely weaken the structure of the walls, while shutting down Londinium's defense artillery system. As the walls begin to crumble, Manfred orders his men to retreat and leaves Horn barely clinging to life. Thankfully, however, she is saved at the last minute by her squad.
This entire time, Clovisia, Siege, Indra, and Morgan have stayed underground to fend off the Sanguinarch. However, they are powerless against such a powerful Vampire, and are forced to run for their lives. Siege inadvertently finds a control panel with a button on it at the end of a passageway—the same button she had pressed over twenty years ago, when Gawain had brought her underground following the uprising against the king. Siege presses the button, which moves the tunnel beneath their feet upward and allows the group to escape to the surface.
Unthinkable
The reunited Glasgow Gang (including Dagda, who has returned with the Victorian mercenaries), the Doctor, Amiya, Clovisia, and Feist all make their way to the train station with the last-minute help of Dagda's guards and board the train leaving for Auchterigg Borough (i.e. Central Londinium). Just then, however, the Kazdelians chasing the train stop. Standing in the middle of the tracks watching the train depart is Theresa, the former Sarkaz King who had "died" long ago. Her majesty's presence horrifies the R.I. gang, especially Amiya and the Doctor, who must now accept the fact that Theresa has somehow come back to life.
Upon reaching Auchterigg Borough, Allerdale Cumberland, the chief commander of Eartha and the late Duke of Cumberland's daughter, welcomes Siege warmly. She then proposes a plan for Siege to lead Victoria to battle against the Sarkaz and take back the throne using the relic of Edward Artorius, as Siege is actually Alexandrina, the last surviving heir to the Aslan throne. W, who had also escaped the city off-screen, confronts Kal'tsit for letting Theresis get hold of Theresa's body, having witnessed her appearance at the train station. Theresis orders Qui'sartuštaj to continue supervising Theresa and Amiya while seemingly plotting to destroy the power of the Lord of Fiends. Outside of the city, the Leader of Dublinn receives news, both of Siege's arrival in Central Londinium and Talulah's escape from R.I. and return to Reunion. Knowing of the rumors that Talulah may be a Draco, and thus a potential threat, The Leader prepares herself to enter the capital. A bloody battle surrounding the throne seems inevitable.
Meanwhile, in a town in northern Ursus, Talulah has finally found another incarnation of the "Deathless Black Snake," a female Hippogryph named Koshelna who has disguised herself as a college lecturer. Koshelna congratulates Talulah for finding her and tries to tempt the other woman into killing her out of vengeance. Talulah refuses, however, believing that the Deathless Black Snake will continue to reincarnate as long as Ursus remains unchanged. After regrouping with Nine and her faction of former Reunion fighters, Talulah decides to follow them to Victoria to carry out her plans.
Operations
Harder operations are in orange-red.
| Main | 10-1 • 10-2 • 10-3 • TR-20 • 10-4 • 10-5 • 10-6 • 10-7 • 10-8 • 10-9 • 10-10 • 10-11 • 10-12 • 10-13 • 10-14 • 10-15 • 10-16 • 10-17 • 10-18 • 10-19 |
|---|---|
| Extreme Mode | H10-1 • H10-2 • H10-3 |
| Addendum | |
| All operations are worth 38 | |


