Reclamation Algorithm
| Reclamation Algorithm | Guide |
| This article is under construction and may contain incomplete and/or inaccurate information. |
Reclamation Algorithm (R.A.) is a game mode in Arknights.
Overview
In Reclamation Algorithm, one starts in a single area and have to expand by developing their base with resources obtained from exploration and battles, and defend their home area from enemy attacks.
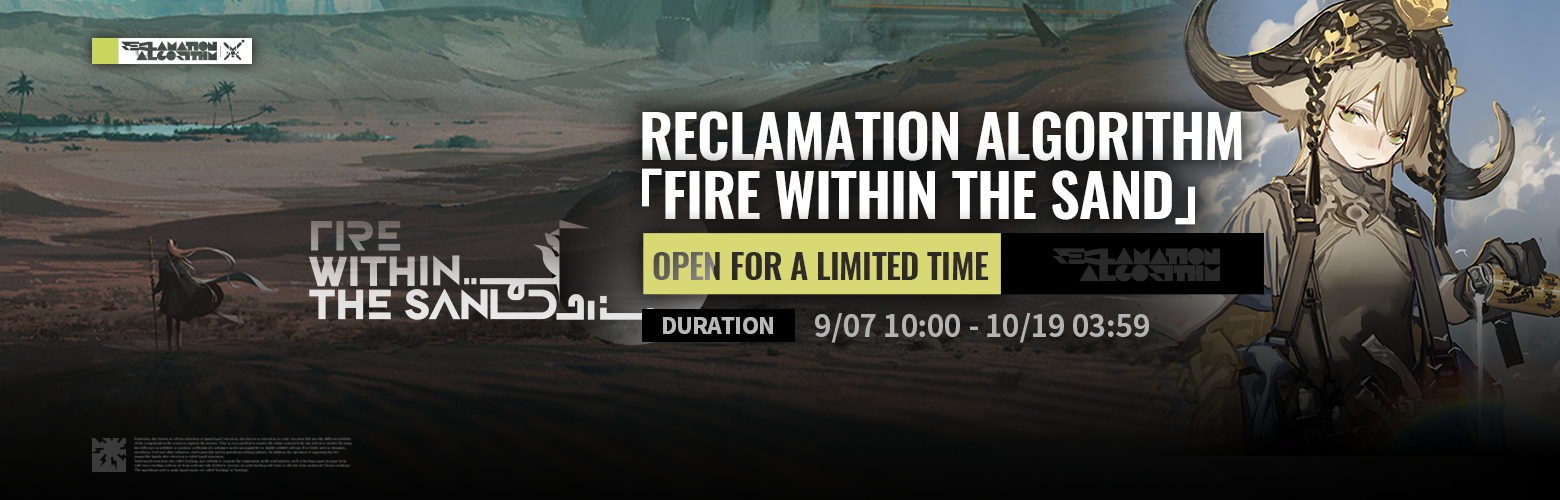
R.A. is accessible once 3-8 is cleared and does not consume the player's ![]() Sanity. From Tales Within the Sand, R.A. is a permanent game mode like that of Integrated Strategies, accessible from the Terminal at all times.
Sanity. From Tales Within the Sand, R.A. is a permanent game mode like that of Integrated Strategies, accessible from the Terminal at all times.
Terminologies used for the rest of this article:
Basics
- Resources
- Materials: For building Constructs and producing Support Items.
- Ingredients: For making Provisions.
- Days: The R.A. campaign is divided into days, which affects the overworld in various ways. The campaign will advance to the next day when all Acts (explained below) are used up or at the player's discretion.
- Day of Suppression (FS): From Day 13 onwards, the player's activity is limited to only intercepting Raids (explained below).
- Algorithm Cycles and Days of Quantification (TS): Every 3 days constitutes as one Algorithm Cycle. The last day of a Algorithm Cycle is the Day of Quantification, where the player's score will be calculated based on their progress and their Automatic Archival (see below) is made. The player's score will be converted into Prosperity Points, which can be used to exchange for items from the Gifts of Prosperity (see below), and Technological Points, which can be used to unlock enhances in the Technology Sequence (see below).
- Acts: The amount of actions that can be carried out by the player. The player initially has two Acts per day, which can be increased through certain methods.
- Not every possible "action" uses up an Act, and some use up more than one. The Act cost is always indicated before taking an action that infers one.
- Acts are replenished daily, but unused ones (if the player manually advances to the next day) will not be carried over to the next.
- (FS) On Days of Suppression, the player will only have a single Act per day.
- Stamina (FS): Operators in R.A. have Stamina; when an Operator participates in an operation, they will lose 1 Stamina, and Operators with 0 stamina will become unusable when brought into an operation. In TS, the Stamina mechanic is replaced by the need to use Electrolyte Isotonics to run an operation instead, which will be explained below; to offset this however, each Operator can only be brought into operations once per day.
- Initially all Operators have 0 Stamina, but the player can choose six Operators whose Stamina will be replenished to the max when starting a campaign, otherwise Stamina can be replenished by having Operators drink Electrolyte Isotonics (explained below) and eat certain Provisions, randomly at the start of a day, and sent into certain Dispatches.
- Operators' Stamina cap depends on their rarity, level, and promotion:
- 1★ and 2★ Operators have a Stamina cap of 1.
- 3★ Operators have an initial Stamina cap of 1, which is increased to 2 at Elite 1 Level 55.
- 4★ and higher Operators have a Stamina cap of 1 at Elite 1 Level 1 or below, 2 from Elite 1 maximum level, and 3 from their respective Operator Module unlock requirement level:
The player can abandon an FS campaign from the Headquarters, but doing this will cause the campaign to be lost. Since the campaign will only actually lost if the Base is destroyed in TS, this is no longer possible.
In FS Transregional Communication can be established by either sending off an Operator to an Escape Route or building a Transregional Communication Station and a certain amount of days have passed, where the player can take some of the resources from the previous campaign along with them upon starting a new one, even if the campaign is lost. The Transregional Communication mechanic is eliminated in TS due to the Automatic Archival mechanic (see below).
In TS, the player can choose to run the campaign under either "Standard Mode" or "Challenge Mode". Under Standard Mode, the campaign will gain the following effects:
- Max HP of Resources -25%;
- Conversion from Ingredients to Electrolyte Isotonics gain +100% effeiency;
- Max HP and ATK of enemies in Raids -50%.
The player can change the current campaign's difficulty mode at the RA's homepage. The effects above will immediately take effect when the mode changes. Modes will not affect the conversion from campaign progress to Prosperity Points. These effects will not affect Foreign Realms (see below).
Zones and Regions
R.A. takes place in an epic-sized region, or "overworld", divided into various zones linked radially in different directions. Exploring the various zones play an important role in R.A..
Zones in FS
| Region | Information |
|---|---|
| Headquarters | Where your journey begins. No matter how many times you've failed, there's a chance to succeed as long as you have a place to call home like this one. The player's starting point and command center, where the following actions can be done using the Sage interface:
|
| Conflict Zone | Chaotic warzone. Here you might encounter warriors that serve different lords ameer. Fight enemies in a repeatable operation like the usual Arknights gameplay.
|
| Mountain Pass | Enemies' stronghold. They will be incapacitated the moment we take the place. Perhaps we can surprise them with an unwarned attack. Elite Raids spawn from time to time in the Mountain Pass until conquered, where the player must destroy the Mobile Battle Tower in the zone within the given time limit. Destroying the tower additionally grants a large amount of resources.
|
| Resource Zone | Unexploited mines lie here. Our base construction can take advantage of its resources. The zone where materials are gathered (explained below).
|
| Hunting Zone | Wild beasts live here. Here we can hunt for our food. The zone where ingredients are gathered (explained below).
|
| No Man's Land | An unclaimed land that sees suspicious peace. We might want to try our luck here and see what we can find. Engage special bosses with absurd stats to obtain rewards based on how much damage was dealt to the boss within the given time limit, even better if the player manages to defeat the boss.
|
| Event | Crowds and clamor. What awaits us here? A random event, like that of Encounters in Integrated Strategies.
|
| Dispatch | A caravan is looking for your company during the journey. Perhaps the trip will reward us. Operators can be sent away for missions which merits various rewards here, like that of character quests in Brigandine.
|
| Black Market | This place is all about bargains. Give out what we have, and the right customers will come to us paying the right price. Exchanges Crude Gold for resources and tools. Unlike other zones, the Black Market will always be present on the northwest corner of the map and entering it does not use up Acts.
|
Zones in TS
| This section is under construction and may contain incomplete and/or inaccurate information. |
| Part of this section still uses the original Chinese texts. You can help the Arknights Terra Wiki by translating it. Please read the translation guidelines first before translating the section. |
| Region | Information |
|---|---|
| Headquarters | Where your journey begins. No matter how many times you've failed, there's a chance to succeed as long as you have a place to call home like this one. |
| Outpost | {{{desc}}} Frontline buffer zones outside the Headquarters that can be freely constructed as trenches against enemy attacks.
|
| Wilderness RV | A barrack can be built by fully unfolding the materials on the RV, which can sometimes exert unimaginable combat effectiveness. A temporary "advance camp" that replaces the Headquaters during special operations (such as the 陌域派遣) that can be freely constructed. Failing an operation in the advance camp will only cause the special operation to fail and will not count as the Headquarters being destroyed.
|
| Rearcourt | The intersection area of the deserts, rainforests and oases, the heart of the lost Szubat-Arsalan. A place where our friends will visit from time to time, and you may be able to get some useful information here. Can be accessed at any time and does not consume Act.
|
| Resource Zone | Unexploited mines lie here. Our base construction can take advantage of its resources. The zone where materials are gathered, similar to the namesake zone in FS.
|
| Hunting Zone | Wild Beasts live here. Here we can hunt for our food. The zone where ingredients are gathered, similar to the namesake zone in FS.
|
| Conflict Zone | Chaotic warzone. Here you might encounter warriors that serve different lords ameer. Fight enemies in a repeatable operation, similar to the namesake zone in FS.
|
| Event | {{{desc}}} |
| Gathering Area | {{{desc}}} |
| Abandoned Town | {{{desc}}} |
| Fortress | {{{desc}}} |
| No Man's Land | {{{desc}}} |
| Mountain Pass | {{{desc}}} |
Regions in TS
Beside the various zones, TS also divides the entire overworld into 4 regions: the Arakeeshtu Jungle, the Narutabatim Alkalies, the Eqlumuy Oasis and the Forbidden Tsalimashtu, each featuring different climate, terrains, resources and events. The player can only explore zones in their unlocked regions. The player can unlock new zones by clearing the Mountain Pass zones.
| Region | Information |
|---|---|
| Arakeeshtu Jungle | {{{desc}}} The initially unlocked region where the player's Headquarters is located. Wood can be obtained here.
|
| Narutabatim Alkalies | {{{desc}}} |
| Eqlumuy Oasis | {{{desc}}} |
| Forbidden Tsalimashtu | {{{desc}}} |
Climate
| This section is under construction and may contain incomplete and/or inaccurate information. |
Zones can have varying weathers that applies a handicap which makes operating in the zone more difficult. As days pass, the weather can become harsher, and some events can trigger weather changes. In TS, the seasons are introduced, which can cause changes to weathers, enemies, terrains and facilities over the entire overworld for a long period of time. Resources in all zones will reset upon a change of season.
| Harvesting Season | No special effects The good news is that people will always be rewarded for their hard work at this time; and the bad news is that some work must be done first. |
|---|---|
| Drenching Season | All Operators have -1 Block and -40% Max HP, <Hidden Flame> tiles no longer deal damage. Days with continuous heavy rain... Who knew that the wind from the Foehn Hotlands would blow so much water vapor here. In such extreme weather, it is difficult for people to keep their spirits up when fighting. |
| Barren Season | Yeild of <Planting Trough Complex> reduces greatly, <Swamp> tiles dry out and become deployable tiles. It's so dry that people's noses bleed more often than it rains. |
| Environment | Weather | Information |
|---|---|---|
 Normal |
Regular weather, no special effects A fine day with clear weather.
| |
 Cloudburst |
FS: Deals 20 Corrosion Damage to all Operators every second TS: Deals 20 Corrosion Damage to all Operators every second; SP recovery rate of water pumps +0.1/s The rain pours down a mix of dangerous elements absorbed from the earth, sparing not even the steel and iron machinery.
| |
| FS: Lightning strikes 3 random tiles (range can overlap) every 30 seconds, dealing 1000 True damage to units on those tiles in an area TS: Lightning strikes 1 random tile (range can overlap) every 40 seconds, dealing 800 True damage to units (excluding facilities) on those tiles in an area; SP recovery rate of water pumps +0.15/s Its said that lightning tends to strike unlucky people...
| ||
| FS: Lightning strikes 3 random tiles (range can overlap) every 15 seconds, dealing 1300 True damage to units on those tiles in an area TS: Deals 20 Corrosion Damage to all Operators every second; Lightning strikes 2 random tile (range can overlap) every 40 seconds, dealing 800 True damage to units (excluding facilities) on those tiles in an area; SP recovery rate of water pumps +0.2/s Thunder and lightning flash right before your eyes. To go out at this time, are you perhaps testing your luck against the elements?
| ||
 Heatwave |
FS: Operators are stunned for 10 Seconds every 50 Seconds TS: Operators are stunned for 10 Seconds every 50 Seconds, Max HP of <Wild Animals> -5%. Dizziness, blurred vision, confusion... the weather is too hot, please try to stay alert.
| |
| FS: Every 20 seconds, the Operator with the lowest Max HP is afflicted with [Burn] (does not stack), receiving 75 Arts damage per second for 10 seconds, and upon subsiding spreads the effect to any nearby Operators in adjacent tiles TS: all Operators are afflicted with [Burn] (receiving 50 Arts damage and 50 Burn Damage, does not stack and can be resisted) for 10 seconds every 30 seconds; Max HP of <Wild Animals> -10%. Prolonged exposure to sunlight makes the ground hot enough to fry eggs, so be careful not to get sunburned while outside!
| ||
| FS: Every 20 seconds, the Operator with the lowest Max HP is afflicted with [Burn] (does not stack), receiving 150 Arts damage per second for 10 seconds, and upon subsiding spreads the effect to any nearby Operators in adjacent tiles TS: All Operators are stunned for 10 Seconds every 50 Seconds; all Operators are afflicted with [Burn] (receiving 50 Arts damage and 50 Burn Damage, does not stack and can be resisted) for 20 seconds every 30 seconds; Max HP of <Wild Animals> -15%. Weather that makes one wonder if this is what being baked feels like. If you stand outside for a while, you can feel your blood literally boiling.
| ||
 Windblaze |
FS: Redeployment Time +50% TS: Redeployment Time +50%; enemies' Movement Speed -5%. Staying dehydrated for too long will deplete everyone's energy.
| |
| FS: A sandstorm starts blowing in a random direction when the mission begins, and allied units caught in the sandstorm will have their ATK -35%. Facilities and other Operators can block the sandstorm to negate the effects. TS: A sandstorm starts blowing in a random direction when the mission begins, and allied units caught in the sandstorm will have their ASPD -30, facilities and other Operators can block the sandstorm to negate the effects; enemies' Movement Speed -10%. A storm in such a dry place makes sand and dust your biggest obstacle. Unless you have constructs or... someone else to cover you.
| ||
| FS: A sandstorm starts blowing in a random direction when the mission begins, and allied units caught in the sandstorm will have their ATK -50%. Facilities and other Operators can block the sandstorm to negate the effects. TS: Redeployment Time +50%; A sandstorm starts blowing in a random direction when the mission begins, and allied units caught in the sandstorm will have their ASPD -50, facilities and other Operators can block the sandstorm to negate the effects; enemies' Movement Speed -15%. Being caught in such a fierce gale full of sand will not just hinder your movements!
| ||
| Additional information | ||
| ||
Operation mechanics
R.A. operations act like normal ones do, but with the following differences:
- Life Points are only relevant for Conflict Zones and Raid interceptions, and there are no penalties for failing them by losing all LP.
- Resource and Hunting Zones, Mountain Passes, No Man's Lands, and Raid interceptions have a time limit shown on the HUD in place of LP; once the time is up, the operation ends and the player's progression up to that point will be accounted for.
- In the HQ defense operation, the Base's HP will be shown on the HUD in place of LP.
- Quitting out of an R.A. operation does not merit any penalties, with the player's progression up until that point remains accounted for.
- Due to its urgency however, the HQ defense operation is the sole exception to this rule; while the player can quit out of it if they haven't used all of their Acts on the day, quitting out of HQ defense if all of their Acts have been used will cause the player to lose the R.A. campaign!
- In Resource and Hunting Zones, and No Man's Lands, enemies have no proper routes as in other operations and wander around the map aimlessly, although certain enemies move in a specific pattern. If a friendly unit with a block count of 1 or higher is inside an enemy's line-of-sight (LOS), they will move towards them and attack, essentially making enemies in these zones serve to harass the player. Furthermore, certain enemies will retaliate towards attackers by going after them even if the attacker is outside the enemy's LOS (can be easily noticed by using Operators with global attacks such as Ambriel w/ Radar Sweep).
- Ranged enemies' LOS matches their attack range, while melee ones have a LOS of x tiles.
- The map is perpetually covered by Fog of War which gives the following implications:
- Enemies inside the Fog of War appears as clouds of pale static and cannot be targeted/affected by attacks/abilities.
- Devices will not appear until the Fog of War is lifted on the tile they are on, and will stay revealed even after the Fog of War returns.
- Protection Objectives and Incursion Points inside the Fog of War are shown as gray boxes (but can still be identified by clicking on them).
- Fog of War does not restrict friendly unit deployment and will be lifted when a unit's attack range (including the tile they were on) overlaps with it.
- Tip: When deploying a friendly unit, look at the undeployable melee tiles. Those tiles could have objects of interest such as resources, NPCs, or others.
- Most R.A. operations' maps are larger than usual, and because of this, it is possible to center the player's view on other areas of the map by dragging the screen, during which the game is slowed to half speed.
- When the game is paused, a quick overview of the map and whatever in the player's current view will be shown.
- On occasion, Resource and Hunting Zones have a secret area with lots of resources which can be identified by the zone having a lower resource yield than it was supposed to. If the player is paying attention, they can spot a Historical Remains among the scenery that can be destroyed to reveal the secret area, so don't miss them out!
- Boss enemies found in No Man's Land and the Lord Ameer's Attack, as well as the Mobile Battle Tower in Mountain Pass nodes will carry over their HP between operations, including phases if they have one.
Resource Zones
Thickets, Monoliths, and/or Strange Ore Veins are present and can be "harvested" by having friendly units attack them; whenever its HP is depleted, the resource's HP will be immediately restored to the max and it will have one unit of the corresponding material that can be collected by deploying Operators (and only Operators) adjacent to them, which will be added to the player's stock once the Operator is retreated. Resources will be exhausted once it is harvested a number of times where it will be destroyed and cannot be gathered from anymore, but uncollected resource units will remain until accounted for.
- Operators can carry resources equal to their block count.
- Any unharvested resources will persist even if the player quits out of the Resource Zone, allowing them to be harvested later.
Hunting Zones
Various Wild Beast enemies are present, which gives out ingredients that corresponded to the Beast when defeated.
- Unlike in Resource Zones, all ingredients are immediately taken to stock as soon as the corresponding Beast is hunted down.
- Any surviving Beasts will remain even if the player quits out of the Hunting Zone, allowing them to be hunted later.
Game Modes and Actions
Standard Algorithm
The regular game mode the player plays.
- Today's News
- Every day of the R.A. campaign, the player will be presented to the player with informations regarding the day.
- Reconnaissance Results: Important happenings in the overworld, such as an NPC being present in the Black Market and Raid in progress.
- Resources Obtained: Resources generated from Constructs.
- Overnight Canteen: From Day 1, up to three random Operators with 0 Stamina will restore 1 Stamina.
- Electrolyte Isotonics
- In FS, Electrolye Isotonics can be used to replenish Operators' stamina, which is made in the Support Department by using raw ingredients or recycling uneaten Provisions. Isotonics restore 1 stamina when drank by an Operator which consumes 10 units, but each Operator can only drink Isotonics once per day and the Isotonics itself has a storage limit.
- In TS, Electrolyte Isotonics is used to run operations, consuming 2 units if the squad is made up of at most 6 Operators or 3 if the squad is made up of more than 6 Operators. They are produced in the Cooking Station by using raw ingredients or uneaten Provisions, with each having a different Energy value and each Isotonic needing 60 Energy to make.
- Resource collection
- When entering Resource and Hunting Zones, the player will be given the opportunity to gather resources there; see below for the mechanics of doing so.
- Note that the resource yield only shows the primary output; the player will have to check the map themselves to see the exact amount, especially since extra resources may show up in the zone.
- Headquarters development
- The Headquarters' Research & Development allows the player to make use of Constructs and Support Items to aid the R.A. campaign.
- For more information regarding Constructs, see here.
- Support Items allows the player to make use of various devices to aid them in R.A. operations. The player can have up to 12 Support Items at a time and no more than 10 units of each type.
Foreign Realms (TS)
| This Section is under construction and may contain incomplete and/or inaccurate information. |
Foreign Realms are special regions outside of the main overworld, where the player can earn rewards by completing certain quests within limited time.
- The player can search for Message Boxes or Messengers' Mailboxes and interact with them to accept quests. When a quest is accepted, the player will leave the main overworld and enter the Foreign Realm on the next Day of Quantification. Once accepted, a quest cannot be declined before entering the Foreign Realm.
- The player can select a Tactical Preference out of the three before entering the Realm to gain certain enhances. There are a total of three Tactical Preferences:
- Combat Elite
- Survival Expert
- Master Engineer
- Foreign Realms are not affected by Seasons of the main overworld, and instead have their own climate and other environmental conditions called the Realm Variables.
- Time of the main overworld will be paused when the player is inside a Foreign Realm, and time spent inside a Foreign Realm will not be counted into the Algorithm Day counter. There are no Days of Quantification inside the Foreign Realms.
Wave of War (TS)
| This Section is under construction and may contain incomplete and/or inaccurate information. |
A special game mode where the player encounter more enemies. As of 13 Feb 2024, this game mode has not been officially introduced to the game yet.
Raids
Enemy Raids may show up on the overworld and will slowly advance to the Headquarters at a rate of one zone per day. Raids also may suddenly appear while undertaking Events or after certain conditions are met during a campaign.
There are three types of Raid:
- Normal Raids are made up of regular enemies and will appear as early as Day 3.
- Elite Raids are made up of powerful enemies and may spawn from Mountain Passes from time to time until they are conquered.
- The Lord Ameer's Attack, which is explained below.
The player can intercept a Raid by engaging them in the zone the Raid is currently in.
- If the Raid is intercepted in combat zones, it will use that zone's map but will only feature enemies part of the Raid and any other features including resource units will not be present.
- If the Raid is intercepted in non-combat zones, it will use one of three special maps chosen at random.
Intercepting a Raid uses up one Act even if multiple Raids are on a single zone, in which case the player will have to engage all of them in one sitting.
When intercepting a Raid, all enemies that makes up the Raid will spawn nearly simultaneously, which can quickly overwhelm the player's Operators if they are not prepared. Therefore, using area-of-effect attacks and multiple Defenders are highly recommended to clear out the Raid.
Intercepting a Raid have two possible outcomes:
- If all enemies in the Raid are defeated, even if any of them managed to enter Protection Objectives, the Raid will be eliminated for good.
- If the players fails the interception, the Raid will remain with any enemies that survived including those who entered Protection Objectives and continue their advance.
In the event a Raid manages to reach the HQ, the player will be forced to defend it and cannot access all zones but the HQ, where they must eliminate the invaders before they can destroy the Base (and compromising the R.A. campaign), making use of whatever Constructs placed in the Base perimeter and the available Operators and Support Items at the time.
As Raids tend to be dangerous at full strength, it is advisable to either eliminate them ASAP or, if the player's Operators are lacking, whittle them down so that they can be easily dispatched by the time they reached the HQ.
Lord Ameer's Attack
On Day 10, the Lord Ameer's Attack – a massive (made up of over 100 enemies) Raid led by a boss with colossal stats, will appear and MUST be eliminated as one of the conditions to win the R.A. campaign. The Attack is extremely difficult to deal with due to consisting of a wide variety of powerful enemies and can even effortlessly overwhelm even a well-developed HQ at full strength, thus it is best to weaken the Attack over the course of multiple interceptions so that they can be finished off without too much difficulty by the time the player have to face the Attack head-on in the HQ.
Questlines
Unique to R.A., various NPCs may appear on the zones and the player can converse with them[note 1] to start or advance questlines – a chain of tasks which expands the story and allows the player to influence the ending of the campaign. Questlines' progress are carried over across all campaigns until ended.
Some Events can also start questlines spanning over multiple tasks.
Token items (not to be confused with tokens) are awarded as the player progresses through questlines, all of which have unique effects to help the player through the campaign and viewable in the Headquarters where they can also be discarded, resetting the questline associated with the token item. Tokens could be By Fate which is permanent and carried over between campaigns until discarded or By Chance which only applies for the campaign it was obtained.
Seasons
As of January 29, 2024, Reclamation Algorithm consists of one former season and one upcoming season:
| Event | Start/end dates | ||
|---|---|---|---|
| CN | Global | TW | |
|
2023/1/29 2023/3/12 |
2023/9/7 2023/10/12 |
2023/12/12 2024/1/13 |
|
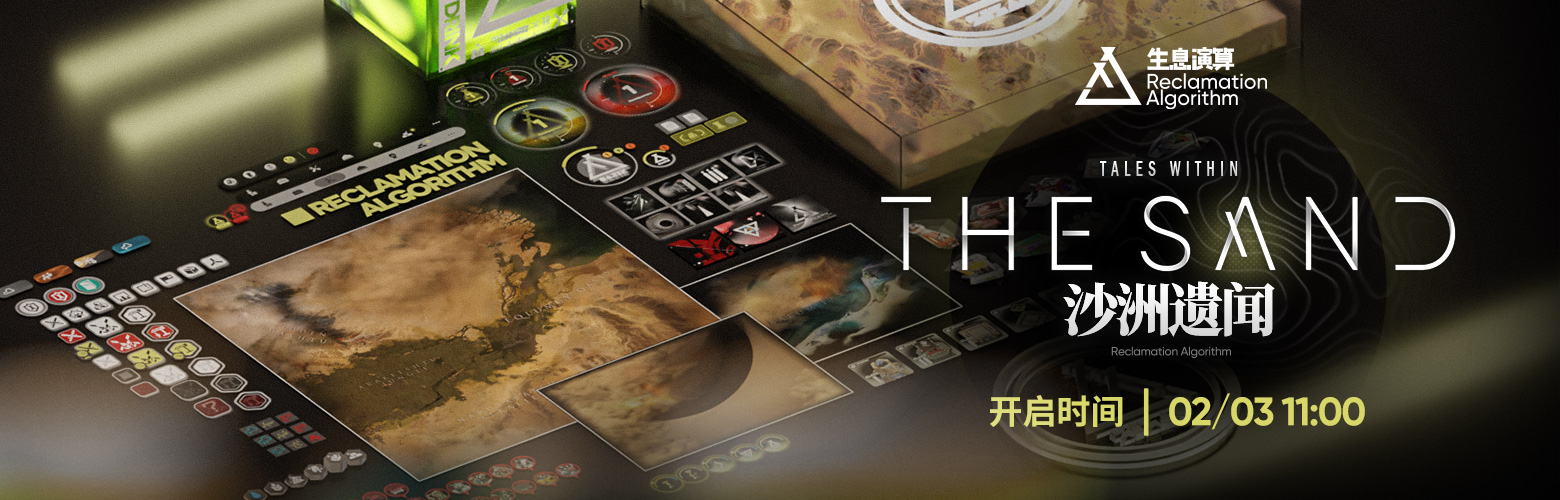
2024/2/3 | Coming soon | Coming soon |
Notes
- ↑ Technically the NPCs are static devices that are "talked to" by activating their skill, which is charged up nearly instantaneously.